Sharpie® Markers Projects
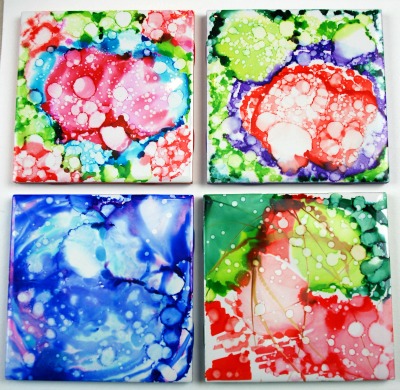
I found some Sharpie® Markers projects and here is one I recently tried out that I SO wanted to share with you.
Who knew you could have so much fun with a bunch of permanent markers and inexpensive glazed ceramic tiles!
I came across this coaster idea online either on Pinterest or on Facebook. I can't remember. Either way, of course I took the idea and pushed it a little more.
You're going to need a handful of items to complete the project.
Assorted Sharpie® Chisel Tip Permanent Markers
White glazed ceramic tiles, 4" x 4" - I got mine from Home Depot
99% Isopropyl (Rubbing) alcohol
Spray bottle set to "mist"
#1 Liner brush
small plastic cup
Self-adhesive cork squares or felt fabric
Super Tacky glue
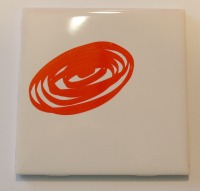
Pour the alcohol into the spray bottle. Mist the tile lightly and wipe it down with a paper towel.
Let it dry.
Here I used the red marker and made a random doodle. It doesn't have to be circular it can be any shape.
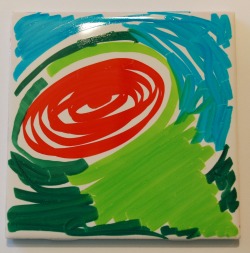
I've used a bright and dark green as well as a light blue to fill in the rest of the tile.
I like to leave small bits of white space. So far so good. Easy peasy!!
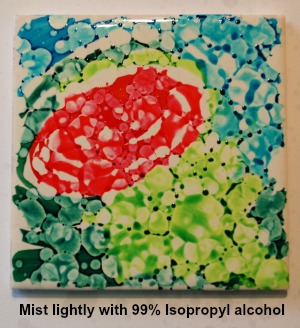
Mist the tile lightly but evenly with the alcohol and let it rest until it dries completely.
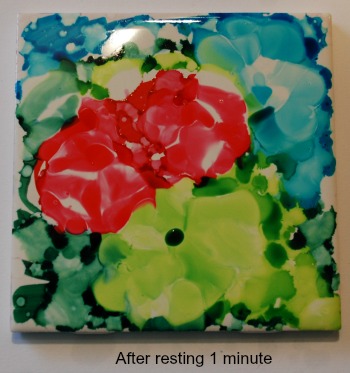
Here's what my tile looked like after sitting there for about 1 minute.
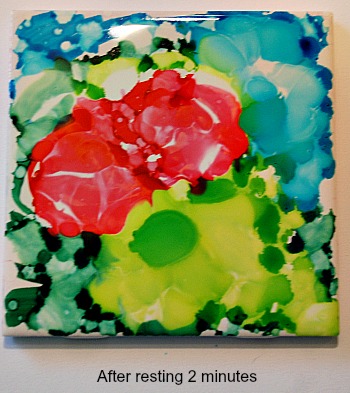
And here is the same tile after sitting still for about 2 minutes.
At this point I poured a small amount of alcohol into a small plastic cup and set it aside close by
and I grabbed my liner brush.
I waited until the alcohol on the tile had completely evaporated and then...
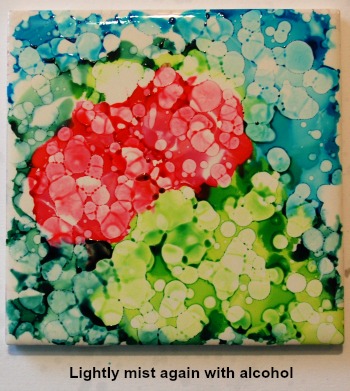
I lightly misted it again all over and before it had a chance to dry completely...
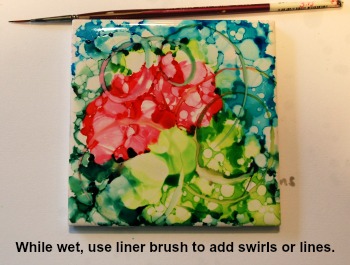
I used my liner, dipped in alcohol and I added swirls and lines.
Of course this is optional if you're already in love with the tile as it is.
Now, having said that, if you absolutely hate your results,
just use clean paper towels to wipe the tile off with alcohol until you get back to the white glaze.
And simply try again. No harm done.
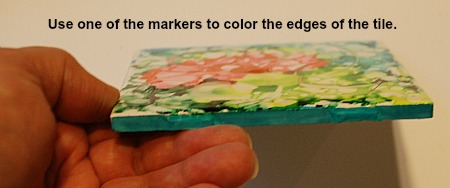
When you're happy with your results, use one of the dominant colors to cover the tile edges.
Likely you'll want to do loads of these as gifts or items to sell at craft shows.
So you need to protect your, ahem, hard work!
You need to "fix" the artwork with a fixative like Prismacolor Tuffilm® Final (matte) before you can actually seal it. Otherwise the markers will re-activate and smear across the glaze.
The sealer I used for this project was Rust-Oleum® Painter's®Touch Ultra Cover Clear Gloss.
And for added protection I applied a coat of Minwax Paste Wax. But that's just me. It's an optional step.
I DID test other permanent markers...
Before we go any further, I did want to share this with you. I own many fabulous brands of permanent markers and I love them all equally for different purposes.
However, when I tried this technique with the other brands they did not perform as shown here... not even close.
Having said that, and you DO have some other permanent markers on hand, nothing stops you from trying out the technique with what you have. Maybe you'll like a more subtle effect or maybe you'll choose to work in layers by "fixing" one layer and repeating the technique over the first. Always explore!
Be bold!
OK, on with the project....
Line the backs of the ceramic tiles.
So as not to scratch counter tops and furniture, you'll need to put a backing on the tiles.
Either cut out 4" x 4" pieces of felt and adhere them on the back with Aleene's Turbo Tacky Glue®
or use a small self-adhesive cork square on each corner.
If you're going to be doing a bazillion of these in one sitting,
make sure you have good ventilation.
Keep young children and pets away when you're misting the alcohol.
And take a break from time to time.
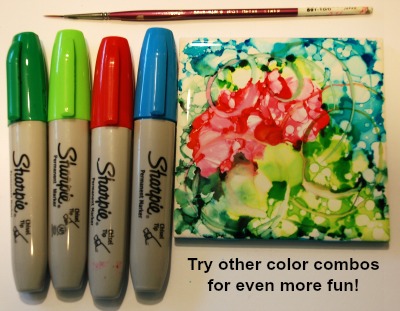
Have fun with this!
For more project ideas featuring Sharpie® Markers visit the Sharpie website here.
Here are links to help you purchase some of the supplies you need.
Most craft stores and hardware stores will carry these items.
For your convenience
I'd love to see your results and do let me know what you thought of this fun project. I'm thinking my gift shopping is all taken care of. Woot!
Did you have fun with this project?
I definitely want to see how your coasters turned out!
You Can Paint These Trees and More
Get Your Video Course Now
Introductory Price
Save 55% plus
a Money Back Guarantee
Site Search
| site search by freefind | advanced |
You Can Paint These Trees and More
Get Your Video Course Now
Introductory Price
Save 55% plus
a Money Back Guarantee



New! Comments
Have your say about what you just read! Leave me a comment in the box below.