Vision Board
The Creative Way of Making Your Goals and Dreams Come true
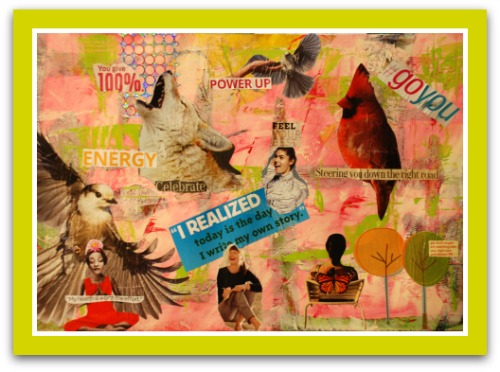
A vision board is probably one of the best tools for a decorative painter or any other creative person when it comes to goal setting and following through with resolutions and intentions.
Creative minds are always more stimulated by doing rather than just thinking about goals and aspirations.
On this page I will share with you a simple way of creating personal vision boards for areas of your life you wish were better than they presently are. But first I want to go over some important things.
What Is a Vision Board?
A vision board is a composition of images / photos and text that represent a desired future in a certain area of one's life.
It is a visual reminder of what you're striving for and it helps you focus on what it is you're after.
It has been proved that visualization techniques work. For example when an athlete sees herself or himself winning the gold medal or improving their time on the race track. By regularly "seeing" themselves and "feeling" what it will be like to reach those outcomes, the athlete excels and wins.
You've probably read about cancer patients who visualized little armies of cells attacking their cancer cells and beating the odds where there was no hope. Not only surviving but beating cancer for good and thriving. Miracle!
So vision boards are a way to keep foremost in your mind what it is you're after. Having the board on display where you can see it everyday is a great way to keep you focused and it's a constant reminder of what it is you really want.
Dream It and Do It
The first part of this process is to become clear on what it is you truly want rather than thinking about what you think you deserve or should want.
Here are ideas to get your creative juices flowing.
- Do you long for a different career?
- Have you always wished to travel to exotic places?
- Do you think about your dream home all the time?
- Is losing weight something you really want to achieve?
- Wish you were healthier and more fit?
- Do you wish you were more wealthy or successful?
- Trying to find a loving life partner?
These are just a few questions to get you thinking. Write down what it is you truly want (it can be more than one thing). Just follow your heart and never mind what your head says. If, for instance, making more money doesn't resonate with you, don't write down "I should make more money." See the difference?
Let's Do This and Have Some Fun!
(and NO it's not frivolous!)
In her book, Visioning - Ten Steps to Designing the Life of Your Dreams, Lucia Capacchione, Ph.D., ATR takes you through the steps required for successful visioning.
Step 1: Make a Wish
Step 2: Search for Images and Words
Step 3: Focus on the Vision
Step 4: Compose the Design
Step 5: Explore and Find Order in Creative Chaos
Step 6: Create the Collage
Step 7: Articulate the Vision
Step 8: Reinforce the Dream
Step 9: Embrace the Reality
Step 10: Celebrate the Dream Come True
I highly recommend her book if you really want to further explore the power of vision boards.
Step-By-Step, Here We go!
Like all projects, we need to gather up our supplies. You likely have most of these things on hand.
- Sharp straight scissors and detail scissors
- White glue, I use Mod Podge Matte finish
- 3/4-inch flat brush
- water basin
- paper towel
- watercolor paper about 18 x 24, I like Strathmore 300 Series Watercolor Pad
- lots of magazines that have loads of images - fashion mags, National Geographic, travel brochures, food mags, pretty much whatever is of interest to you. Don't forget your own snapshots!
- acrylic paints
- permanent markers
- colored pencils
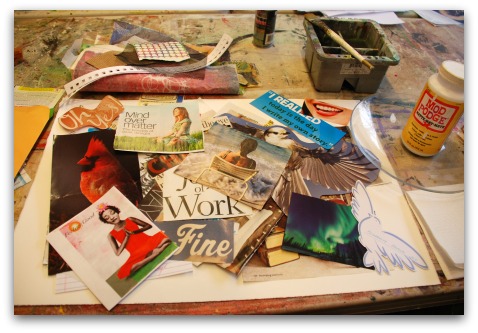 Magazine cut outs, watercolor paper, glue, water basin and paper towel. All set!
Find an area where you can lay
out your stuff and have room to work.
The space should be well lit.
Cutting is messy so be sure to have a garbage can or bag nearby.
I begin by cutting images and
text that appeal to me. Even though I
may be working on, say a board for weight loss, I will keep all images that I'm
attracted to and will sort them later.
I love cutting out images and text.
It's a very relaxing activity.
At this stage I'll sort the
images and text into themes and keep them in marked file folders: "Health", "Dream Home",
"Successful Business", etc.
Put cold water in your water
basin (size of margarine container).
Take a couple sheets of paper towel and fold them to make a blotter.
After the cutting is done I will start playing with my background on the watercolor paper. I may choose to paint the background by just slip slapping and mixing paints all over. Or I may do a bit of collage using interesting Japanese washi paper or scrapbooking paper or handmade paper. Or I may glue my magazine cut outs directly on the white paper.
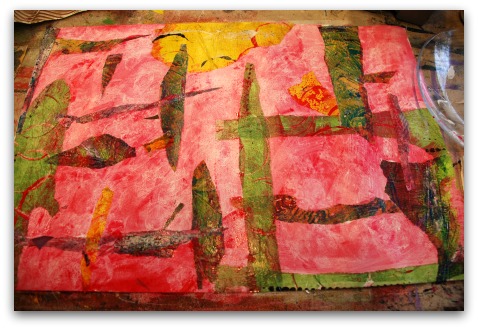 Here I've prepared my watercolor paper by collaging handmade papers and applying washes of red paint. I prefer getting rid of the white background.
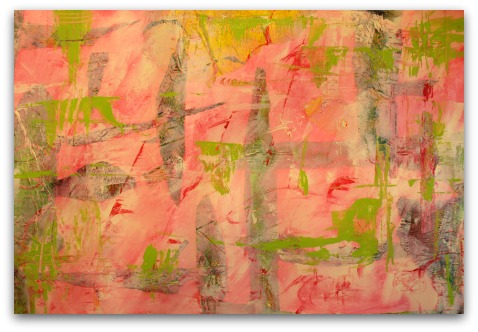 I next applied some opaque warm white paint all over to make it more cohesive. I scratched into the wet paint and added a few small, bold dashes of red, green gold and more warm white. I like the softer look.
Wait for everything to dry completely at this point.
Once you're ready to start
playing with your cut out images, place a bit of Mod Podge on a foam plate.
Before adhering the pieces to your watercolor paper, experiment with a variety of positions that feel good to you, and then glue the images to the paper.
First moisten the brush with water and blot it. Pick up the glue and apply it to the watercolor paper where you want to glue the image. Quickly place the image in place and add the glue on top of the image working any air pockets out.
Papers may wrinkle either a little or a lot. But don't fret about it. It all ends up looking good in the end.
Keep going until you're happy with your vision board. Don't be afraid to add torn papers, embellishments, stencil designs and words or even add more paint to your board. It's your board and it should speak to you!
 Here it is finished and simply matted. No frame required unless you really want to frame it!
Here are a couple more so you can get an idea of how limitless the options are!
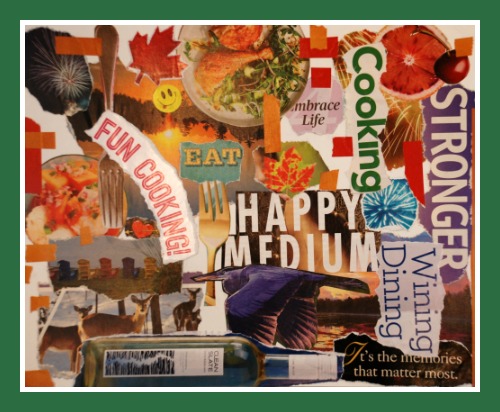 My vision was "make more time for me, my friends and my family."
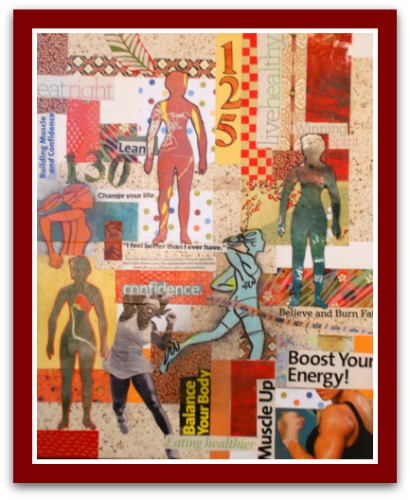 This vision board is for my ultimate weight loss goal... half way there! Woot!
I would just like to see you use your painting skills and have some fun imagining a better future for yourself and to have your dreams come true! It works for me and it will work for you too.
Below are some of the things I use in creating a vision board. They are links to Amazon and although there is no additional cost to you I do get a teensy weensy commission. It keeps my kitties in cat food and me in art supplies so I can keep bringing you more and more tutorials.
Let's go from the vision board page back to the Home page.
You Can Paint These Trees and More
Get Your Video Course Now
Introductory Price
Save 55% plus
a Money Back Guarantee
Site Search
| site search by freefind | advanced |
You Can Paint These Trees and More
Get Your Video Course Now
Introductory Price
Save 55% plus
a Money Back Guarantee



New! Comments
Have your say about what you just read! Leave me a comment in the box below.