PAINTING METAL
Doing it right from the start!
Painting metal is very rewarding when you can transform tinware, old and new, into beautiful home accents or gifts.
Before painting however, there's still the all-important step of sealing or priming your pieces. See our in-depth instructions for cleaning metal if you haven’t done so already. The metal has to be very clean before anything else can begin and it also needs some “tooth”.
Spray on Primer
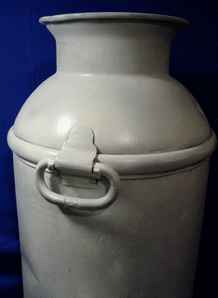
Other then sticking with pre-primed tinware, which is a Godsend (no prep work, yippee!)… the next best thing is to spray the clean metal pieces with rust-inhibiting primer.
After a minimum of 24 hours, you can go ahead and paint (basecoat) your background color and continue on with the design.
At this point, the milk can shown on the left, has been through all of the steps involved in cleaning metal.
Have a peek to see how it looked in the beginning!
Mixing an acrylic sealer with acrylic paint.
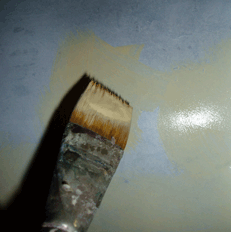
Another method is to mix your background acrylic paint with an All Purpose Sealer, such as Jo Sonja.
Pick up small amounts of this mixture on a large flat brush and apply it by working in small sections.
It’s a good idea to slip slap the mix onto the entire surface, rather than applying with long strokes.
This helps to avoid ridges and adds further “tooth”.
Heat Setting
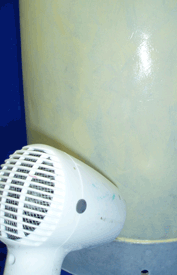
For good adhesion when painting metal, it’s advisable to do 2-3 coats. Use your blow dryer to speed things up. And wait for the metal to cool completely between coats.
After applying this mixture as your basecoat, you can then "heat set" the tinware by placing it in the oven for 20 minutes at 200 F. Turn off the heat and allow the piece to cool slowly in the oven.
In the hot weather, you can set your piece outside in the sun for a few hours.
Whichever method you decide on, wait for the metal to cool down completely before you go any further.
IMPORTANT: The longer you let the pieces sit and cure, the better!
So, try to prepare many pieces all at once. That way when the mood strikes, you can just go to your stockpile of goodies. The preparations were done long ago! Everything has cured and… you’re all set to get some metal painting done!
Save yourself some heartache… Remove your rings and bracelets!!!
The fact is, although you've taken steps to protect the surface by cleaning, drying, priming and curing, this film is still vulnerable to scratches and nicks.
The primed and basecoated surface you create on top of the tinware is an all-important film indeed. But every new layer that you add affects the strength of the film…making it more vulnerable, at least until it has cured for a long time. In a nutshell, the reason for all these preparations is simple. When painting metal, you want to ensure that your surface becomes and remains beautiful and durable for years to come.
We'd love to hear from you with questions or interesting tips. Why not contact us here?
Let's leave Painting Metal and go to Metalware.
Return to our Decorative Painting Home Page.
You Can Paint These Trees and More
Get Your Video Course Now
Introductory Price
Save 55% plus
a Money Back Guarantee
Site Search
| site search by freefind | advanced |
You Can Paint These Trees and More
Get Your Video Course Now
Introductory Price
Save 55% plus
a Money Back Guarantee



New! Comments
Have your say about what you just read! Leave me a comment in the box below.